Do you own any public blog?
Do you write often?
Do you find peace when you sit down with your laptop and start pouring your thoughts on to the white canvas of your screen?
Do you love telling stories?
Do you enjoy when some stranger comments on your writing/article?
Or you simply enjoy writing.
If yes, then there is no reason why you shouldn’t start your own blog.
Let’s talk about me for a minute…
I started writing when I was in school.
I started with Blogger.com, and I used to write regularly; something or the other. And in less than a year, I had more than 300 articles on the Blogspot.
That is a big number.
Those articles were short and personal, like a daily diary, but close to heart.
Those blogs helped me to connect with distant people who shared the same interests as I did. And I also made some good friends.
But one day, I logged in and everything was swept off. There was no trace of my blogs. All gone.
I was traumatized.
So I logged out… and logged in again. But still, there was no trace of my articles.
I immediately wrote an email to the support team of Blogspot explaining them about it.
Waited for an hour just to know that it was some maintenance activity from there end. And they were sorry for the inconvenience. According to them, this shouldn’t have happened.
But this incident was an eye-opener.
My content was not mine after all.
I had a realization.
In a blink of an eye, Blogspot can choose to shut down and all my blogs and articles will be gone forever.
They have full authority over my data.
They control the look and feel of my blog.
They have the actual power. Not Me.
On the other hand, I was the one writing and they were making the actual money out of it because it was their platform.
This reason was enough for me to start my own blog.
By own blog I mean a self-hosted blog. That will be fully managed by me.
That way I will have the complete authority and control over every aspect of it. From design, look and feel to the monetization aspects of it.
That was a powerful motivation to start my own blog.
Well, this article is not about me. It is about you and your upcoming blog. So let’s see how can you start.
Table of Contents
Where To Begin?

I know you have no idea how to start your own blog. Or maybe you do and just looking for a nice tutorial. Whatever it is, this article is going to help you set up your blog step-by-step using WordPress and Digital Ocean.
I will not confuse you with all the different services/tools/platforms that you can choose from. I will only talk about one combination and that is WordPress with Digital Ocean.
I will try to keep this article as short as possible to give you only the things that are needed. So if you think you need more information on something then feel free to discuss in the comments below.
Also, I would recommend you to read these articles for a better understanding:
- You Don’t Have To Be A Big Celebrity To Start A Blog Now
- How to save money on the web hosting renewals?
- Best Five Useful Advice Every New Blogger Must Implement
Create Your Own Self Hosted Blog
DigitalOcean Sign Up
The very first thing in the equation – Sign Up On Digital Ocean.
Use the following link to get $100 credit on sign up:
Disclaimer: This is an affiliate link which means once you signup and spend your first 25 dollars, I get a small fee from DigitalOcean in exchange. Also, on using this link you get an upfront 100 dollars credited to your account. So this way it benefits both sides. I want to make it very clear that this does not increase the cost or usage price in any way.
Once you have signed up successfully, you will see that $100 has been credited to your account. This is where you start.
DigitalOcean is proud of their product and thus they want genuinely interested techies/enthusiast to trial their product and choose for themselves.
Visit DigitalOcean Marketplace
The next step is to navigate to the MarketPlace and click on WordPress One-click Installation. Refer to the image below:

Once you have clicked on the WordPress Staff Pick button, you will be taken to the description page. Here you will find all the related information about this package. Go through the description if you want, and then click on the Create WordPress Droplet Button. Refer to the image below:

Create Droplet
If you have signed up already and logged-in then it will take you to the droplet creation page:

Scroll down a little bit and you will see the listed plans. Click on the show all plans link.

You will see all the standard plans offered by Digital Ocean. Below are the currently listed plans.

You have the $100 in your account to experiment with the droplets. So feel free to go insane.
But for the starter, I would suggest you get started with the 5 dollar plan as you won’t be getting much traffic in the initial days of your blog. And also, 5 dollar plan is a decent plan.
I’m not stopping you from going higher-up; if you think you would be using your VPS for more than just a blog then feel free to climb up the ladder and choose what best suits your needs.
Choose a Datacenter Region
Once you have finalized/selected the plan, scroll down a little bit to the Datacenter region.

DigitalOcean is well distributed and offers 8 different data centres around the globe.
Think about your target audience geo-location before selecting the datacenter. The datacenter can actually help you to reduce the Network Latency between your website and visitors. So give it a thought.
Ignore the Block Storage and Additional Options at this point. You won’t need at this point (or next 6 months).
Droplet Authentication
Next comes the part of your Droplet Authentication.
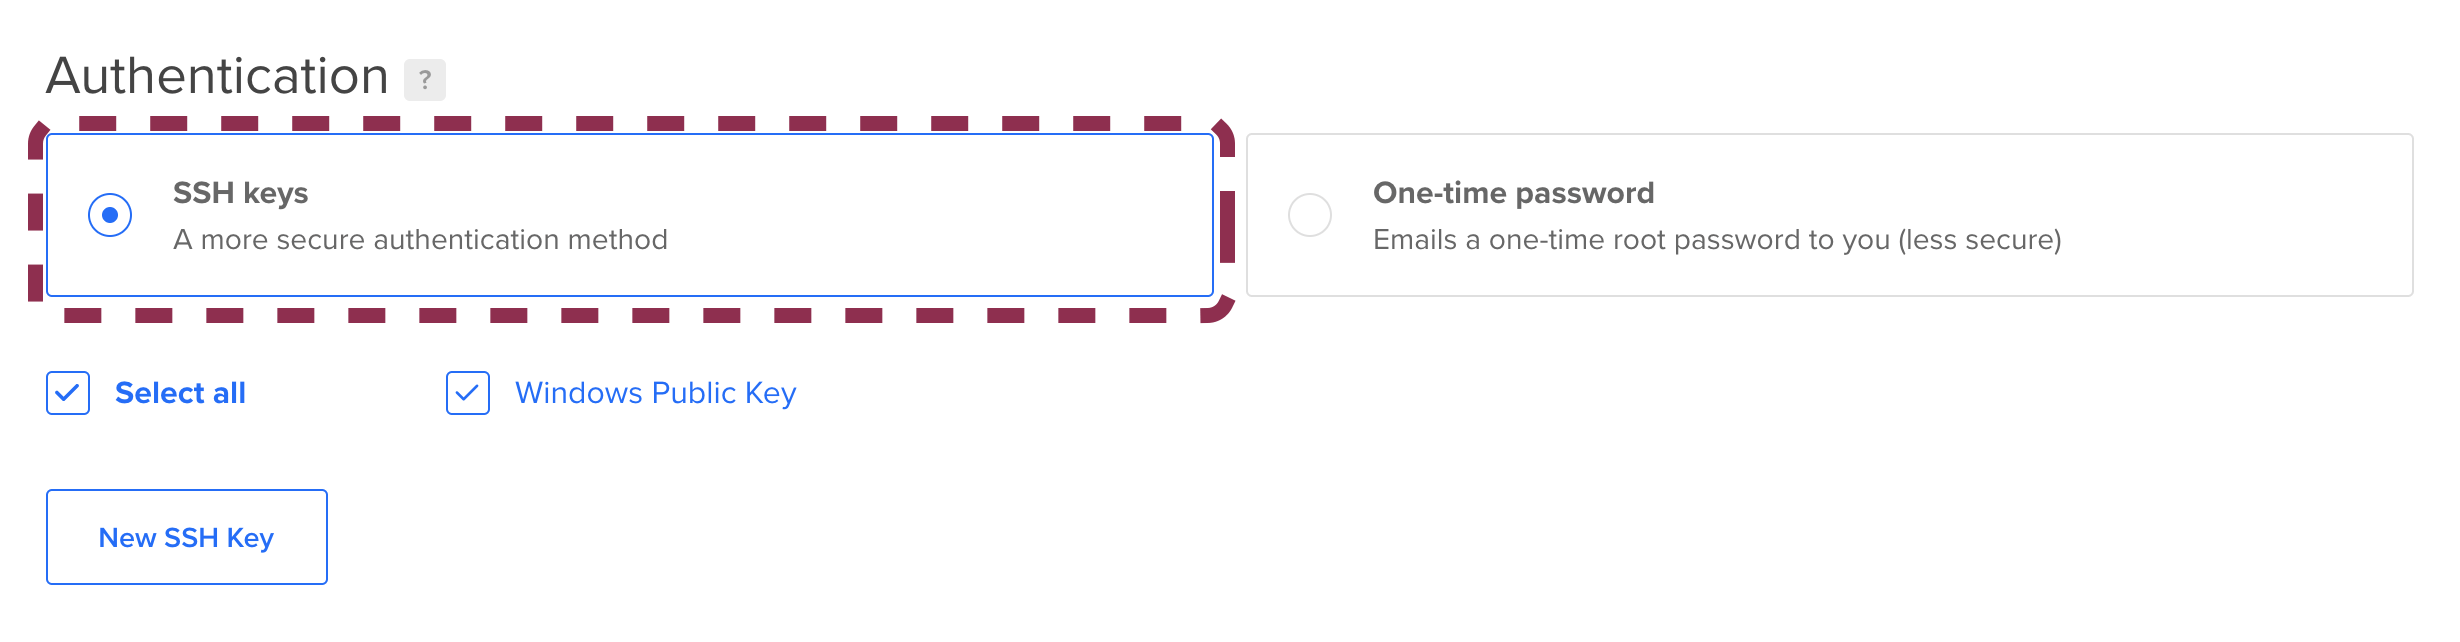
This I will leave on to you, based on your ease and knowledge.
But if you know how SSH works and you are comfortable with SSH login then I would strongly recommend that as it provides more security.
Well this article is not about how SSH Login works, but if you want to know about it then I’ve written a short and crisp article on that which you can read here:
Finalize Your Droplet
Great Job! You have worked your way to the end. Now the final thing that is remaining is the meta-information related to your droplet.
Choose a meaningful name for your droplet. This will be useful if you have more than one droplet.

And if you are someone like me who cannot afford to lose a single byte of data, then opt for the backups from day one. Every week a complete snapshot of your droplet is taken automatically, so if by any chance your droplet has been hacked or corrupted or crashed then you can always go back in time and resurrect it completely.
I opted for the backups from the start as I ported my website from a different platform to DigitalOcean.
Let me show you how backups look like:

As you see Restore event in the highlighted row. It is for the images that I have used in the past to restore the state of my droplet.
I’ve faced problems with the droplet before where some software corrupts while upgrading, or you are attacked by a hacker. The only way to restore your state back without or minimum data loss is TIMELY BACKUPS.
And the good thing about it is that it does it silently every week. You don’t need to do a thing for taking the backup. You wouldn’t even know.
In the end, I would say it suits yourself. If you are willing to spend an extra dollar or 2 for the added security then, by all means, go for it.
That brings us to the end of this article and if you have any questions or feel you need help with anything, comment below. I usually respond quickly (less than 2 hours).
And most importantly, share this article with your friends and family.